Introduction
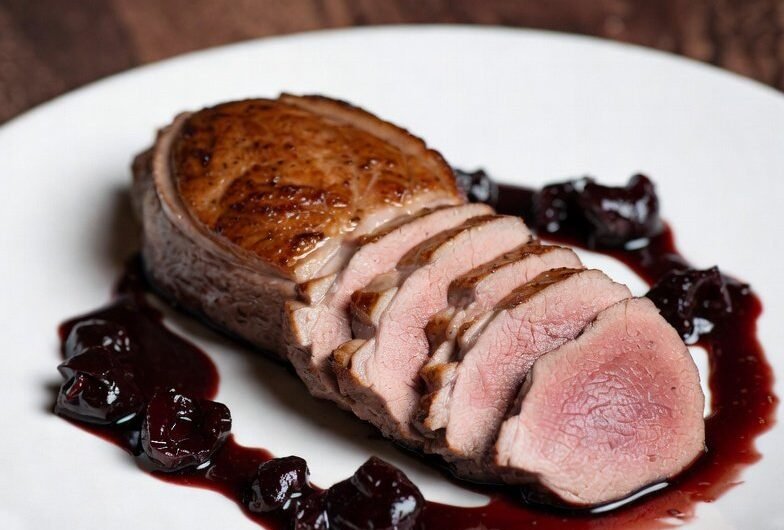
Imagine sinking your teeth into a rich, succulent slice of pan-seared duck breast, its skin beautifully crisped to golden perfection. Accompanying this culinary delight is a luscious cherry sauce that bursts with the vibrant sweetness of fresh cherries, complemented by a hint of tang. This Pan-Seared Duck Breast with Cherry Sauce isn’t just a meal; it’s a celebration of flavors and textures, perfect for impressing guests or indulging yourself on a special night.
With its balance of savory and sweet, this dish transforms simple ingredients into a gourmet experience. The aromatic cherry sauce, with its deep red hue, offers a stunning contrast against the duck’s dark, tender meat, making your plate a feast for the eyes as well as the palate. Cooking this dish is a delightful journey—one that promises to evoke warmth and satisfaction with every bite.
Ingredients
- 2 duck breasts (about 6 oz each)
The duck breasts are tender and flavorful, providing a rich base for the dish. Look for breasts with a good layer of fat for optimal crispiness during cooking. - 1 cup fresh cherries, pitted and halved
Fresh cherries bring a natural sweetness and tartness, enhancing the sauce and pairing beautifully with the duck’s flavor. Frozen cherries can be used if fresh isn’t available. - 1/2 cup chicken broth
Adds depth and umami to the cherry sauce. Feel free to use low-sodium broth for a healthier option. - 1 tablespoon balsamic vinegar
The vinegar adds acidity and complexity, balancing the sweetness of the cherries perfectly. A red wine vinegar can also work in a pinch. - 1 tablespoon honey
Enhances the sauce with a touch of natural sweetness, bringing harmony to the overall flavors. - Salt and pepper to taste
Essential for seasoning the duck breast, ensuring the rich flavors shine through. - 1 tablespoon unsalted butter
Added at the end to enrich the sauce and give it a glossy finish. For a dairy-free version, you might skip this step. - Fresh thyme for garnish (optional)
A touch of fresh thyme elevates the dish with an aromatic finish and adds a beautiful presentation.
Directions & Preparation
Step 1: Score the skin of the duck breasts in a crosshatch pattern without cutting into the meat.
Scoring allows the fat to render effectively, leading to crispy skin. This visual cue will also help when searing, as the fat will sizzle and bubble, filling your kitchen with a savory aroma.
Step 2: Season the duck breasts generously with salt and pepper.
Seasoning the meat ensures a flavorful base and enhances the dish’s taste. The salt reacts with the fat, helping it to crisp up beautifully on the skillet.
Step 3: Place the duck breasts skin-side down in a cold skillet, then turn the heat to medium-high.
Starting in a cold skillet helps render the fat slowly, resulting in perfectly crispy skin. Listen for a gentle sizzle as the fat begins to release, indicating it’s working effectively.
Step 4: Cook for about 6-8 minutes, or until the skin is golden brown and crisp.
Maintain medium-high heat but watch for any smoke; reduce if necessary. The sound of sizzling should be even and constant, signaling the delicious rendering of fat.
Step 5: Flip the duck breasts and cook for another 5 minutes for medium-rare doneness.
Use tongs to avoid piercing the meat. The breasts should feel slightly firm but still yield a bit under pressure, indicating a perfect medium-rare.
Step 6: Transfer the duck breasts to a plate, cover loosely with foil, and allow to rest.
Resting is crucial as it allows the juices to redistribute throughout the meat, ensuring every bite is moist and tender. While resting, those lovely flavors will continue to deepen.
Step 7: In the same skillet, add the cherries and cook for 2-3 minutes until they start to soften.
This will create a relaxing, fruity aroma in your kitchen. Watch as the cherries turn vibrant and juicy, making your mouth water with their enticing scent.
Step 8: Add chicken broth, balsamic vinegar, and honey to the skillet, stirring well.
As these ingredients combine, a beautiful harmony of flavors begins to develop. The broth will bubble and thicken, coating the cherries in a luscious sauce.
Step 9: Reduce the sauce for about 5 minutes until slightly thickened, then stir in the butter.
The butter enriches the sauce and adds a luxurious finish. You should see it melt and blend seamlessly, turning the sauce glossy and appealing.
Step 10: Slice the duck breasts and serve with the cherry sauce drizzled on top, garnished with fresh thyme.
Plating is key! Present the duck on a warm plate, with the vibrant cherry sauce cascading over. The final touch of thyme visually elevates the dish into something truly special.
The Art of Searing Duck: Why It Matters
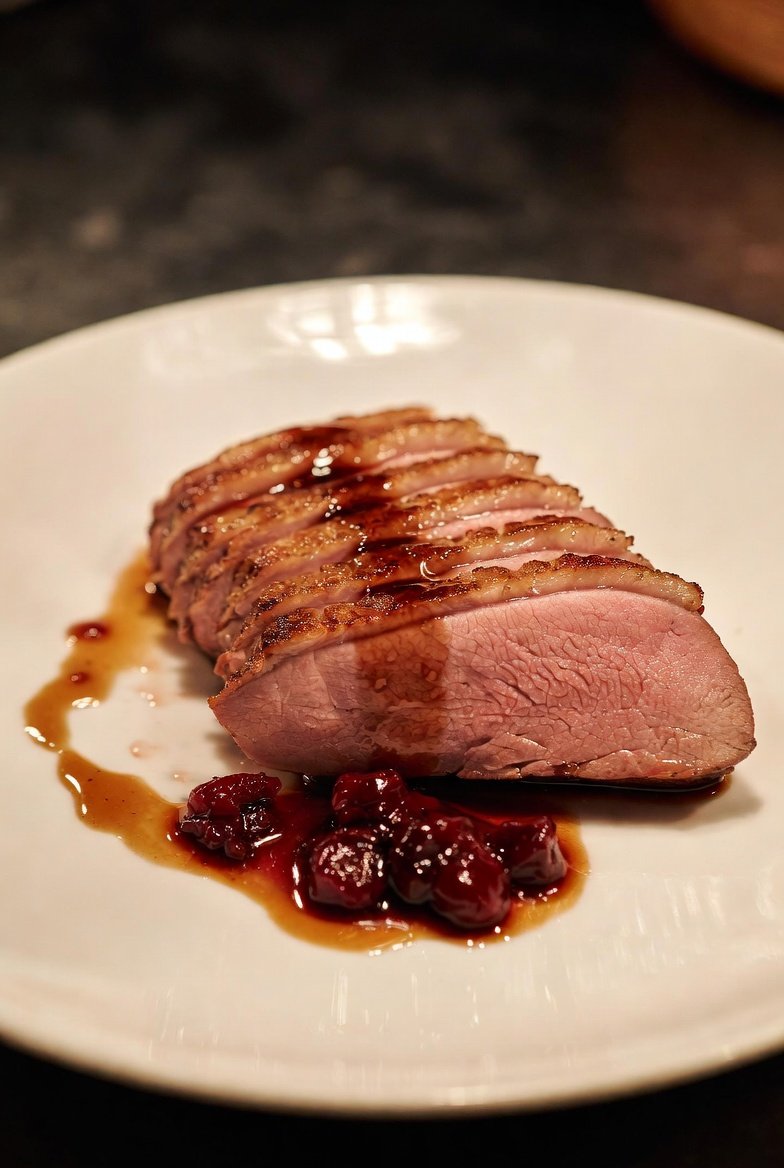
Searing duck properly is vital for achieving that perfect crispy skin. With duck, low and slow is the secret. Starting in a cold pan helps render the fat gradually, ensuring that skin is not just cooked, but transformed into a savory, crackling layer that gives way to tender meat below. It’s a method that champions texture and flavor, making the entire dish unforgettable.
Unlocking the Power of Fresh Cherries
Fresh cherries in this dish do more than just provide a burst of flavor; they offer natural sweetness that reduces the need for excessive sugar. Their tartness balances the rich duck, creating an exquisite dance of flavors in your mouth. Plus, when cooked down, they become a thick, luxurious sauce that clings lovingly to each slice of duck, making every bite a delicious revelation.
The Finish: Butter and Balance
Adding butter to the cherry sauce isn’t just a flourish—it’s a game changer. It transforms the sauce, imparting a silky texture that clings lovingly to the duck. The buttery gloss enhances the overall visual appeal too. This step elevates a simple sauce into a decadent finishing touch that perfectly balances the savory meat and the cherry’s vibrant sweetness.
FAQs
Can I use frozen cherries for the sauce?
Yes, frozen cherries are a great alternative if fresh ones are unavailable. Just remember to thaw them first and drain any excess liquid before adding them to the pan.
What sauce consistency should I aim for?
You want a sauce that’s thick enough to coat the back of a spoon but still pourable. It should glisten beautifully and not be too runny, lending a rich dimension to the duck.
Can I make the cherry sauce in advance?
Absolutely! The cherry sauce can be made ahead and stored in the fridge. Simply reheat it gently before serving to recapture its luscious texture.
What’s the best way to ensure my duck breast is cooked perfectly?
Use a meat thermometer to check for an internal temperature of 135°F for medium-rare. Resting the duck after cooking is crucial for juicy meat. Don’t rush this essential step!
How can I adjust the sweetness of the sauce?
You can reduce the honey if you prefer a less sweet sauce or add a splash more balsamic vinegar for acidity. Taste as you go to achieve your desired balance.
What sides pair well with Pan-Seared Duck Breast with Cherry Sauce?
Roasted vegetables, creamy mashed potatoes, or a light salad work wonderfully. Choose sides that balance the richness with freshness.
Conclusion
Cooking Pan-Seared Duck Breast with Cherry Sauce is not just about filling your plate; it’s about crafting an experience that tantalizes your taste buds and fills your home with an inviting aroma. The balance of flavors and textures makes this dish a worthy addition to your culinary repertoire.
So why wait? Gather your ingredients and let this delightful recipe transport you to a gourmet dining experience right in your kitchen. Whether it’s a weeknight treat or a special occasion, this dish is sure to impress you and your guests alike.
Notes
Additional serving suggestions: pair with a crisp salad, garlic bread, or roasted seasonal vegetables for balance.
For make-ahead, prep components separately and assemble just before heating to preserve texture.
Taste and adjust with acid (lemon/vinegar) and salt right at the end to wake up flavors.