Introduction
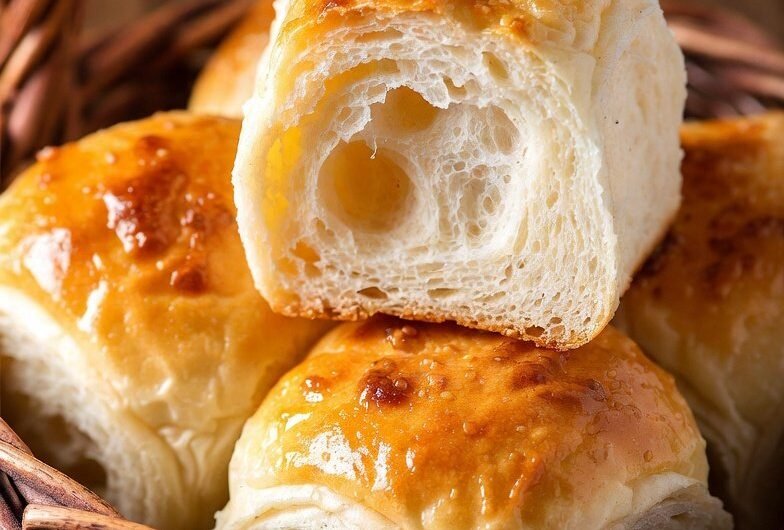
There's nothing quite like the aroma of freshly baked Buttery Dinner Rolls wafting from the oven. Soft, pillowy, and golden-brown, these rolls practically melt in your mouth. Just imagine tearing one open to reveal its warm, fluffy interior, while the rich, buttery goodness coats each bite.
Whether paired with a hearty stew or served warm with a pat of salted butter, these rolls elevate any meal into an extraordinary feast. They are not just food; they are moments shared at the dinner table, comforting and warm, beckoning you to take one more. Ready to whip up a batch today?
Ingredients
- 4 cups all-purpose flour
This is the base of our rolls, providing the structure and necessary gluten to create fluffy, tender results. - 1/4 cup granulated sugar
Adding sweetness, sugar enhances the flavor and aids in browning, resulting in a beautiful golden crust. - 1 packet (2 1/4 tsp) instant yeast
Yeast is crucial for leavening; it creates bubbles in the dough, which makes the rolls rise and become delightfully airy. - 1 teaspoon salt
Salt not only enhances the flavor but also strengthens the dough's structure, resulting in a lovely texture. - 3/4 cup whole milk, warmed
Milk adds richness and moisture, making the rolls soft and tender while also activating the yeast. - 1/2 cup unsalted butter, melted
Butter lends a delectable richness and flavor, and its fat content helps keep the rolls moist. - 2 large eggs
Eggs add richness, help with binding, and create a beautiful golden color in the final bake.
Directions & Preparation
Step 1: Mix dry ingredients together.
In a large mixing bowl, whisk together the flour, sugar, yeast, and salt. This ensures even distribution, allowing the yeast to activate more efficiently. The moment the whisk touches the flour, you'll smell that comforting, warm aroma, ready to turn into something beautiful.
Step 2: Combine wet ingredients.
In a separate bowl, whisk together the warm milk, melted butter, and eggs. As you mix, the butter creates a rich sheen, promising a buttery finish. The warmth of the milk will awaken the yeast, and you can already envision those rolls rising.
Step 3: Combine wet and dry mixtures.
Pour the wet mixture into the dry ingredients, stirring with a wooden spoon until a sticky dough forms. You'll want to enjoy the feel of the dough; it should be slightly tacky, pulling away from the sides of the bowl with a gentle tug.
Step 4: Knead the dough.
Turn the dough onto a floured surface and knead for 5-7 minutes. With each fold and press, you're developing gluten, which will give your rolls their structure. As you work, they begin to feel smooth and elastic, a sign of the perfect dough.
Step 5: Let the dough rise.
Place the dough in a greased bowl, covering it with a kitchen towel, and let it rise for 1-2 hours in a warm spot. As it rises, excitement fills the kitchen with the lingering smells of yeast and dough. You'll notice it doubles in size, full of air bubbles.
Step 6: Shape the rolls.
Once risen, punch down the dough to release air, then divide it into equal portions. Shape each piece into a ball, the smooth surface providing hints of the fluffy treasures to come. Line them up in a greased baking pan, ready for their second rise.
Step 7: Second rise.
Cover the shaped rolls with the kitchen towel again and let them rise for 30 minutes. This time, watch as they puff up, pressing against one another. It's a delightful sight, the promise of warmth and fluffiness.
Step 8: Bake the rolls.
Preheat your oven to 375°F (190°C) and bake the rolls for 18-20 minutes until golden brown. The sound of them baking fills your home, inviting everyone to gather. You'll see that lovely color forming, a light crunch replacing the soft, pillowy interior.
Step 9: Brush with butter and serve.
As soon as they come out of the oven, brush the tops with melted butter. It's an essential finishing touch, creating a glossy sheen and a rich flavor that envelopes each roll. Serve them hot, passing around the butter, and watch them disappear!
The Art of Shaping Dough: Why It Matters
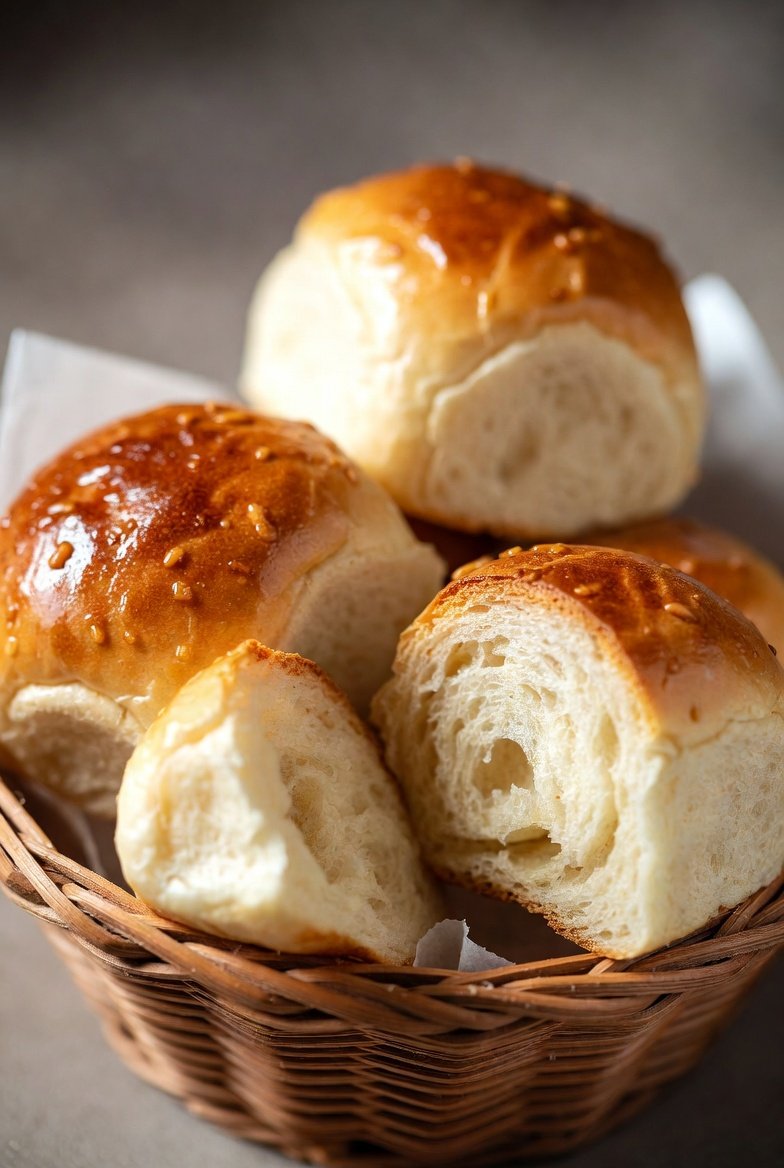
Shaping your dough is more than a step; it’s a chance to create beautiful, uniform rolls. Each ball should be smooth and tight to ensure even baking. Proper shaping helps the rolls rise higher and promotes a tender crumb. When you pull them apart, you want to see those soft layers glistening, each piece showcasing your skill. Don’t rush this step; the results speak for themselves.
Why Warm Ingredients Make a Difference
Using warm milk and eggs can make a significant impact on your rolls. Warm ingredients not only activate the yeast more effectively but also help create an airy texture. The moment you mix those warm ingredients into the dough, you'll feel the transformation. They encourage a quicker rise and contribute to that distinct flavor and tenderness. It’s a simple tip that elevates your dinner rolls to a whole new level.
Timing Your Rise: The Key to Perfect Rolls
The timing of your dough's rise cannot be overlooked. Yeast is a living organism, and it needs time to perfectly ferment and develop flavors. Watching the dough double in size is a visual cue that can’t be missed—it means your rolls will be light and fluffy. Proper timing allows for that deep, delicious taste and light texture that everyone loves. Patience truly pays off here!
FAQs
What if my dough doesn't rise?
If your dough isn’t rising, check the yeast's freshness and the warmth of your environment. Yeast needs warmth to activate, so consider moving it to a warmer location like near an oven.
Can I make these rolls smaller?
Absolutely! You can make mini rolls by dividing the dough into smaller portions. Just keep an eye on baking time as smaller rolls will cook quicker.
Can I add herbs or garlic for flavor?
Yes! Adding herbs or minced garlic to the dough can elevate the flavor profile. Just be cautious not to overpower the buttery goodness.
What happens if I over-knead the dough?
Over-kneading can make the rolls tough and chewy instead of soft and fluffy. Aim for a smooth, elastic texture without going beyond 7 minutes.
Why are my rolls dense?
Dense rolls can result from not allowing enough rise time or using cold ingredients. Ensure your ingredients are at room temperature to achieve the best rise.
What would happen if I skip the second rise?
Skipping the second rise may result in denser rolls. This step allows the dough to relax and expand, contributing to that sought-after lightness.
Can I use whole wheat flour instead?
Yes, but using whole wheat flour will alter the texture slightly; they may be denser. Consider a mix of whole wheat and all-purpose for a healthier twist.
How do I keep my rolls soft after baking?
To keep your rolls soft, store them in an airtight container or wrap them in plastic wrap as they cool to retain moisture.
Conclusion
These Buttery Dinner Rolls are truly a labor of love that reward you with the most scrumptious results. Their warm, comforting presence at the dinner table fosters connections and memories sure to last a lifetime. As you share these freshly baked delights with family and friends, you’ll inspire others to find joy in homemade cooking.
So roll up your sleeves, gather your ingredients, and make today the day you fill your home with that irresistible aroma. Your dinner is calling for these rolls, and once tasted, they will become a staple at your table!
Recipe Card
Notes
Additional serving suggestions: pair with a crisp salad, garlic bread, or roasted seasonal vegetables for balance.
For make-ahead, prep components separately and assemble just before heating to preserve texture.
Taste and adjust with acid (lemon/vinegar) and salt right at the end to wake up flavors.